Programmatic navigation in SwiftUI project

In this highly competitive market, developers do their best to achieve a compelling user experience in their mobile apps. This includes not only building amazing features available inside their apps, but also a native integration into the iOS system.
Among these integrations there are few techniques that allow for launching the app with an instruction to display specific app page instead of the default landing screen:
- Deep linking with Universal Links or Custom URL Scheme
- Local and Remote Notifications
- Siri Shortcuts
- Spotlight Search
- Home Screen Quick Actions
- Handoff
While you could easily find a tutorial for either of these features, there is one topic I found unconsidered yet:
Following the deep link instruction, how can we programmatically navigate to a custom content screen in a SwiftUI app?
These were many ways to achieve this in UIKit (most of which were ugly), but SwiftUI brought in a completely new paradigm for building the UI with its own way for the screen navigation.
A functional successor of AppDelegate in SwiftUI apps is SceneDelegate, which inherited these two methods for providing the app with the navigation instructions:
1
2
3
func scene(_ scene: UIScene, continue userActivity: NSUserActivity)

func scene(_ scene: UIScene, openURLContexts URLContexts: Set<UIOpenURLContext>)
The challenge here is to forward this instruction to the SwiftUI’s view hierarchy for displaying the right content.
All we have by default is the ContentView created in the scene(_:, willConnectTo:, options:), without a way to access the underlying views.
The only way we can toggle what’s displayed is by changing the state bound to the views.
There are two different types of state to which the View can be bound:
- Local
@Statevariable - Variable defined on an external
ObservableObject(with or without@Publishedattribute)
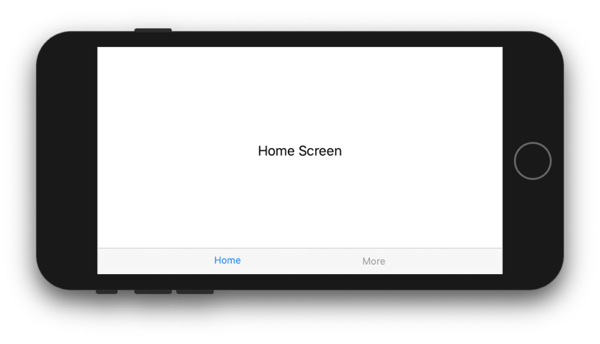
Let’s take a TabView (a replacement for UITabBarController) as the experiment subject and build a simple app that looks like this:

The view-state binding for toggling the tabs can be built using @State:
1
2
3
4
5
6
7
8
9
10
11
12
13
14
15
16
17
18
19
20
21
22
struct ContentView: View {

    @State var selectedTab: Tab = .home

    var body: some View {
        TabView(selection: $selectedTab) {
            Text("Home Screen")
                .tabItem { Text("Home") }
                .tag(Tab.home)
            Text("More Screen")
                .tabItem { Text("More") }
                .tag(Tab.more)
        }
    }
}

extension ContentView {
    enum Tab: Hashable {
        case home
        case more
    }
}
…and using ObservableObject:
1
2
3
4
5
6
7
8
9
10
11
12
13
14
15
16
17
18
19
20
21
22
23
24
25
26
27
28
29
30
31
32
33
34
struct ContentView: View {

    @ObservedObject var viewModel: ViewModel
    // Alternatively:
    // @EnvironmentObject var viewModel: ViewModel

    var body: some View {
        TabView(selection: $viewModel.selectedTab) {
            Text("First Screen")
                .tabItem { Text("First") }
                .tag(Tab.home)
            Text("Second Screen")
                .tabItem { Text("Second") }
                .tag(Tab.favorites)
        }
    }
}

extension ContentView {
    class ViewModel: ObservableObject {
        var selectedTab: ContentView.Tab = .home {
            willSet { objectWillChange.send() }
        }
        // Alternatively:
        // @Published var selectedTab: ContentView.Tab = .home
    }
}

extension CountriesList {
    enum Tab: Hashable {
        case home
        case favorites
    }
}
When we type $ before the variable name with the attribute @State, @ObservedObject or @EnvironmentObject, we retrieve a special entity of type Binding.
Binding is the access token you can pass around for providing direct read and write access to the value without granting ownership (in terms of retaining a reference type) or copying (for a value type).
When the user selects a tab in the TabView, it unilaterally changes the value through Binding and assigns the associated .tag(...) to the selectedTab variable. This works the same way for both @State and ObservableObject
The programmer can also assign a value to that selectedTab variable at any time – and the TabView will toggle the displayed tab immediately.
This is the key to the programmatic navigation in SwiftUI.
Every view that toggles the displayed hierarchy, be that TabView, NavigationView or .sheet(), now uses Binding to control what’s displayed.
So if we had access to the Binding (or factual underlying state) in the SceneDelegate, we would be able to tell the SwiftUI views to display the screen we want instead of the default one.
There are two approaches to this problem.
1. Storing the navigation variables in the centralized AppState
The first approach implies creating a shared app state that is injected in the view hierarchy though .environmentObject(...) method on the root view:
1
2
3
4
5
6
7
8
9
10
11
12
13
14
15
16
17
18
19
20
21
22
23
24
25
26
27
28
29
30
31
32
33
34
35
36
37
38
39
40
41
42
43
44
45
46
47
48
class AppState: ObservableObject {
    @Published var selectedTab: ContentView.Tab = .home
    @Published var showActionSheet: Bool = false
}

class SceneDelegate: UIResponder, UIWindowSceneDelegate {

    lazy var appState = AppState()

    func scene(_ scene: UIScene, willConnectTo session: UISceneSession,
               options connectionOptions: UIScene.ConnectionOptions) {
        let contentView = ContentView()
            .environmentObject(appState)
        ...
    }

    func scene(_ scene: UIScene, openURLContexts URLContexts: Set<UIOpenURLContext>) {
        // Parse the deep link
        if /*Deep link leads to the More tab*/ {
            appState.selectedTab = .more
            appState.showActionSheet = true
        }
    }
}

struct ContentView: View {

    @EnvironmentObject var appState: AppState

    var body: some View {
        TabView(selection: $appState.selectedTab) {
            MoreTabView().tag(ContentView.Tab.more)
            ...
        }
    }
}

struct MoreTabView: View {

    @EnvironmentObject var appState: AppState

    var body: some View {
        Text("More Tab")
        .actionSheet(isPresented: $appState.showActionSheet) {
            ActionSheet(title: ...)
        }
    }
}
2. Broadcasting navigation parameters through external Publisher
The second approach is to use a Publisher from Combine to deliver the navigation state updates:
1
2
3
4
5
6
7
8
9
10
11
12
13
14
15
16
17
18
19
20
21
22
23
24
25
26
27
28
29
30
31
32
33
34
35
36
37
38
39
40
41
42
43
44
45
46
47
48
49
50
51
52
53
54
55
56
struct NavigationCoordinator: EnvironmentKey {
    let selectedTab = PassthroughSubject<ContentView.Tab, Never>()
    let showActionSheet = PassthroughSubject<Bool, Never>()
}

class SceneDelegate: UIResponder, UIWindowSceneDelegate {

    lazy var navigation = NavigationCoordinator()

    func scene(_ scene: UIScene, willConnectTo session: UISceneSession,
               options connectionOptions: UIScene.ConnectionOptions) {
        let contentView = ContentView()
            .environment(\.navigationCoordinator, navigation)
        ...
    }

    func scene(_ scene: UIScene, openURLContexts URLContexts: Set<UIOpenURLContext>) {
        // Parse the deep link
        if /*Deep link leads to the More tab*/ {
            navigation.selectedTab.send(.more)
            navigation.showActionSheet.send(true)
        }
    }
}

struct ContentView: View {

    @Environment(\.navigationCoordinator) var navigation: NavigationCoordinator
    @State var selectedTab: Tab = .home

    var body: some View {
        TabView(selection: $selectedTab) {
            MoreTabView().tag(ContentView.Tab.more)
            ...
        }
        .onReceive(navigation.selectedTab) {
            self.selectedTab = $0
        }
    }
}

struct MoreTabView: View {

    @Environment(\.navigationCoordinator) var navigation: NavigationCoordinator
    @State var showActionSheet: Bool = false

    var body: some View {
        Text("More Tab")
        .actionSheet(isPresented: $showActionSheet) {
            ActionSheet(title: ...)
        }
        .onReceive(navigation.showActionSheet) {
            self.showActionSheet = $0
        }
    }
}
This is really up to you which method to use, but there are conceptual differences.
The first approach assures that the selected navigation parameters remain selected even if the content view cannot pick it up yet. Some view along the way may be showing a loading indicator, but once it finishes and presents the final child view hierarchy, one of the children can eventually pick up the navigation parameter and behave accordingly.
This simply won’t work with the second approach, unless you change PassthroughSubject to CurrentValueSubject to always hold the navigation state. But in this case, you’d need to reset the value manually once the navigation is complete.
You don’t need to reset the navigation state for the first approach, because App State, holing the navigation parameters, is the single source of truth for the entire program and SwiftUI will be updating those values as the user continues navigating in the app.
Navigation through multiple views
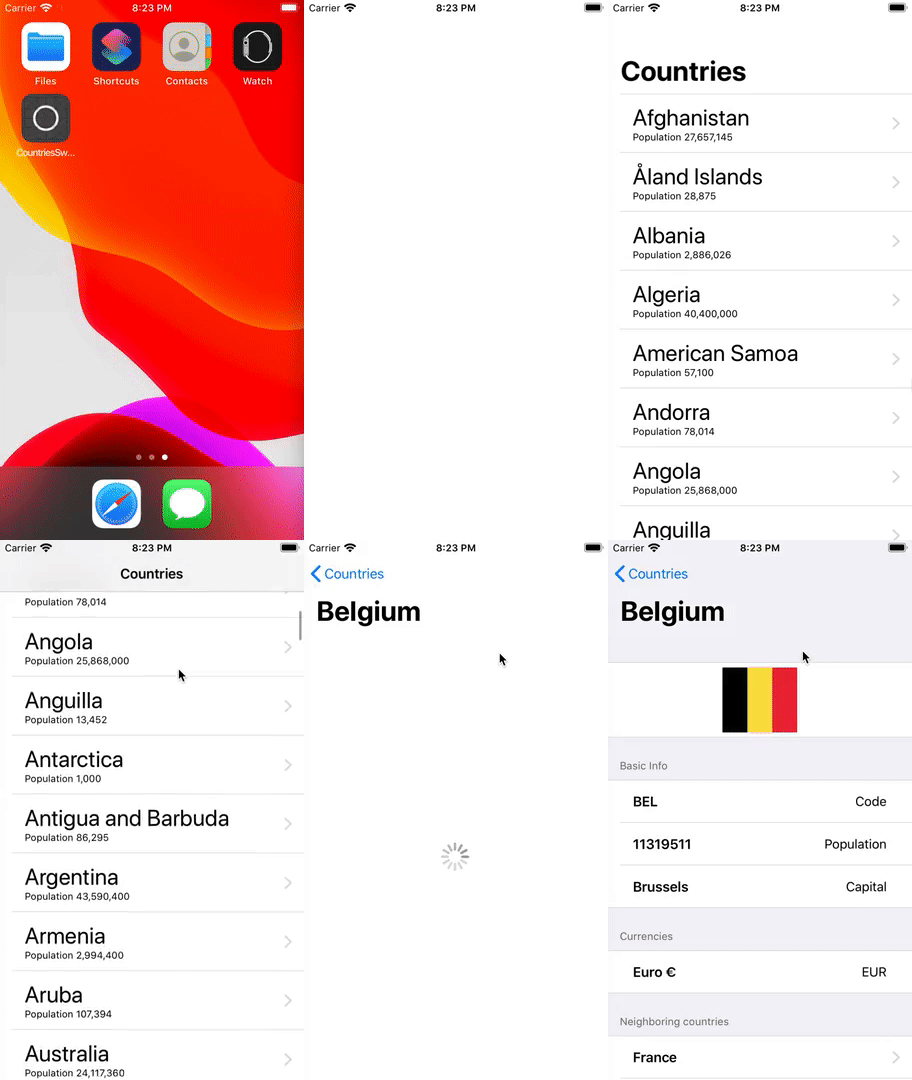
Using one of the approaches described above you can programmatically navigate to a screen at any depth (example).
The only requirement: for every “navigatable” view along the way to the deep link’s target view, you need to allocate a separate navigation parameter in the AppState or in the broadcasted message.
Then, inside the scene(_ scene, openURLContexts:) you need to toggle all the navigation parameters at once, and SwiftUI view hierarchy will transition to the target screen at one step.
List doesn’t correctly support programmatic navigation
While I was implementing deep links in the sample project, I found a hidden pitfall with programmatic navigation through List
Consider this simple setup:
1
2
3
4
5
6
7
8
9
10
11
12
13
14
15
16
17
18
19
20
21
22
23
24
struct Item: Identifiable {
    let id: String
    let name: String
}

struct ContentView: View {

    @State var items: [Item] = /*An array of 100 items*/
    @EnvironmentObject var appState: AppState

    var body: some View {
        NavigationView {
            List(items) { item in
	            NavigationLink(
	                destination: ItemDetailsView(item: item),
	                tag: item.id,
	                selection: self.$appState.selectedItemId) {
	                    Text(item.name)
	                }
	        }
            .navigationBarTitle("Items")
        }
    }
}
The app simply shows a list of 100 text items. Let’s suppose, we implemented a deep link that opens ItemDetailsView for item with specified id. We try it with the URL like so:
https://www.100items.com/details?id=5
.. and it works. The app launches and parses the URL to assign 5 to the appState.selectedItemId and immediately shows ItemDetailsView pushed on top of the List.
So far so good. But once you try another id, say 75:
https://www.100items.com/details?id=75
The code works just the same way, but the List doesn’t push the ItemDetailsView.
What is going on? We know the item with id 75 exists in the list, but for some reason, the details screen is not get pushed.
It turns out that the List’s item we’re pushing to has to be currently visible in the List in order for the programmatic navigation to work.
Once you scroll the list to make the target item visible, you’ll see an unappealing effect: the scrolling suddenly stops and details view appears without animation on the navigation stack:

List is optimized the same way UITableView was, so it tracks the displayed items and lazily loads the content as needed.
Because of this, the List is unaware of the Item with id=75 and so it does nothing until it gets to know it is actually in the array.
This bug could be fixed if we had access to the scroll offset of the List to adjust it for this edge case, but we cannot: there is no API to change the offset of the List.
A hotfix to this issue I see right now is moving the target item to the first position in the array so the List could pick up the NavigationLink correctly. Or we could simply not rely on programmatic navigation through the List
The sample project that supports deep links can be found on Github. It was initially created for illustration of the article Clean Architecture for SwiftUI, I recommend you to check it out as well.
Let's connect!
Subscribe to RSS feed or follow my Twitter for the new articles alerts. And let's connect on LinkedIn as well!